Cargo Light With Latching Relay
My 3-door Land Rover Defender 110 did not have a rear dome/courtesy light and I grew tired of using my phone or headlamp when grabbing things from the truck at night. I thought about fitting an extra OEM style dome light but I wanted something that could be engaged from any of the common access points on the vehicle: inside the cab, from any the four gullwing windows or the rear door.
I came up with the following requirements:
The light should be controlled by any number of push-buttons (any button turns it ON, any button turns it OFF)
The light should be functional even when the key is out of the ignition
Defaults to OFF when power is removed from the circuit
No parasitic current draw in the OFF state
The mechanical package should have the same footprint as the OEM dome light
I considered utilizing a microprocessor but didn’t like the the idea of parasitic current draw when not in use, even though it could be made rather miniscule. I opted to design a circuit that drove the light via a latching relay. A “flip flop” IC can be used to “latch” the coil of a relay with a momentary on push button and with the buttons wired in parallel, any of the buttons can be used to trigger the IC. I wired up a breadboard prototype circuit to confirm it was achieving my desired functionality. The video below showcases the latching relay, multi-button control and defaulting to OFF when power is removed and re-engaged:
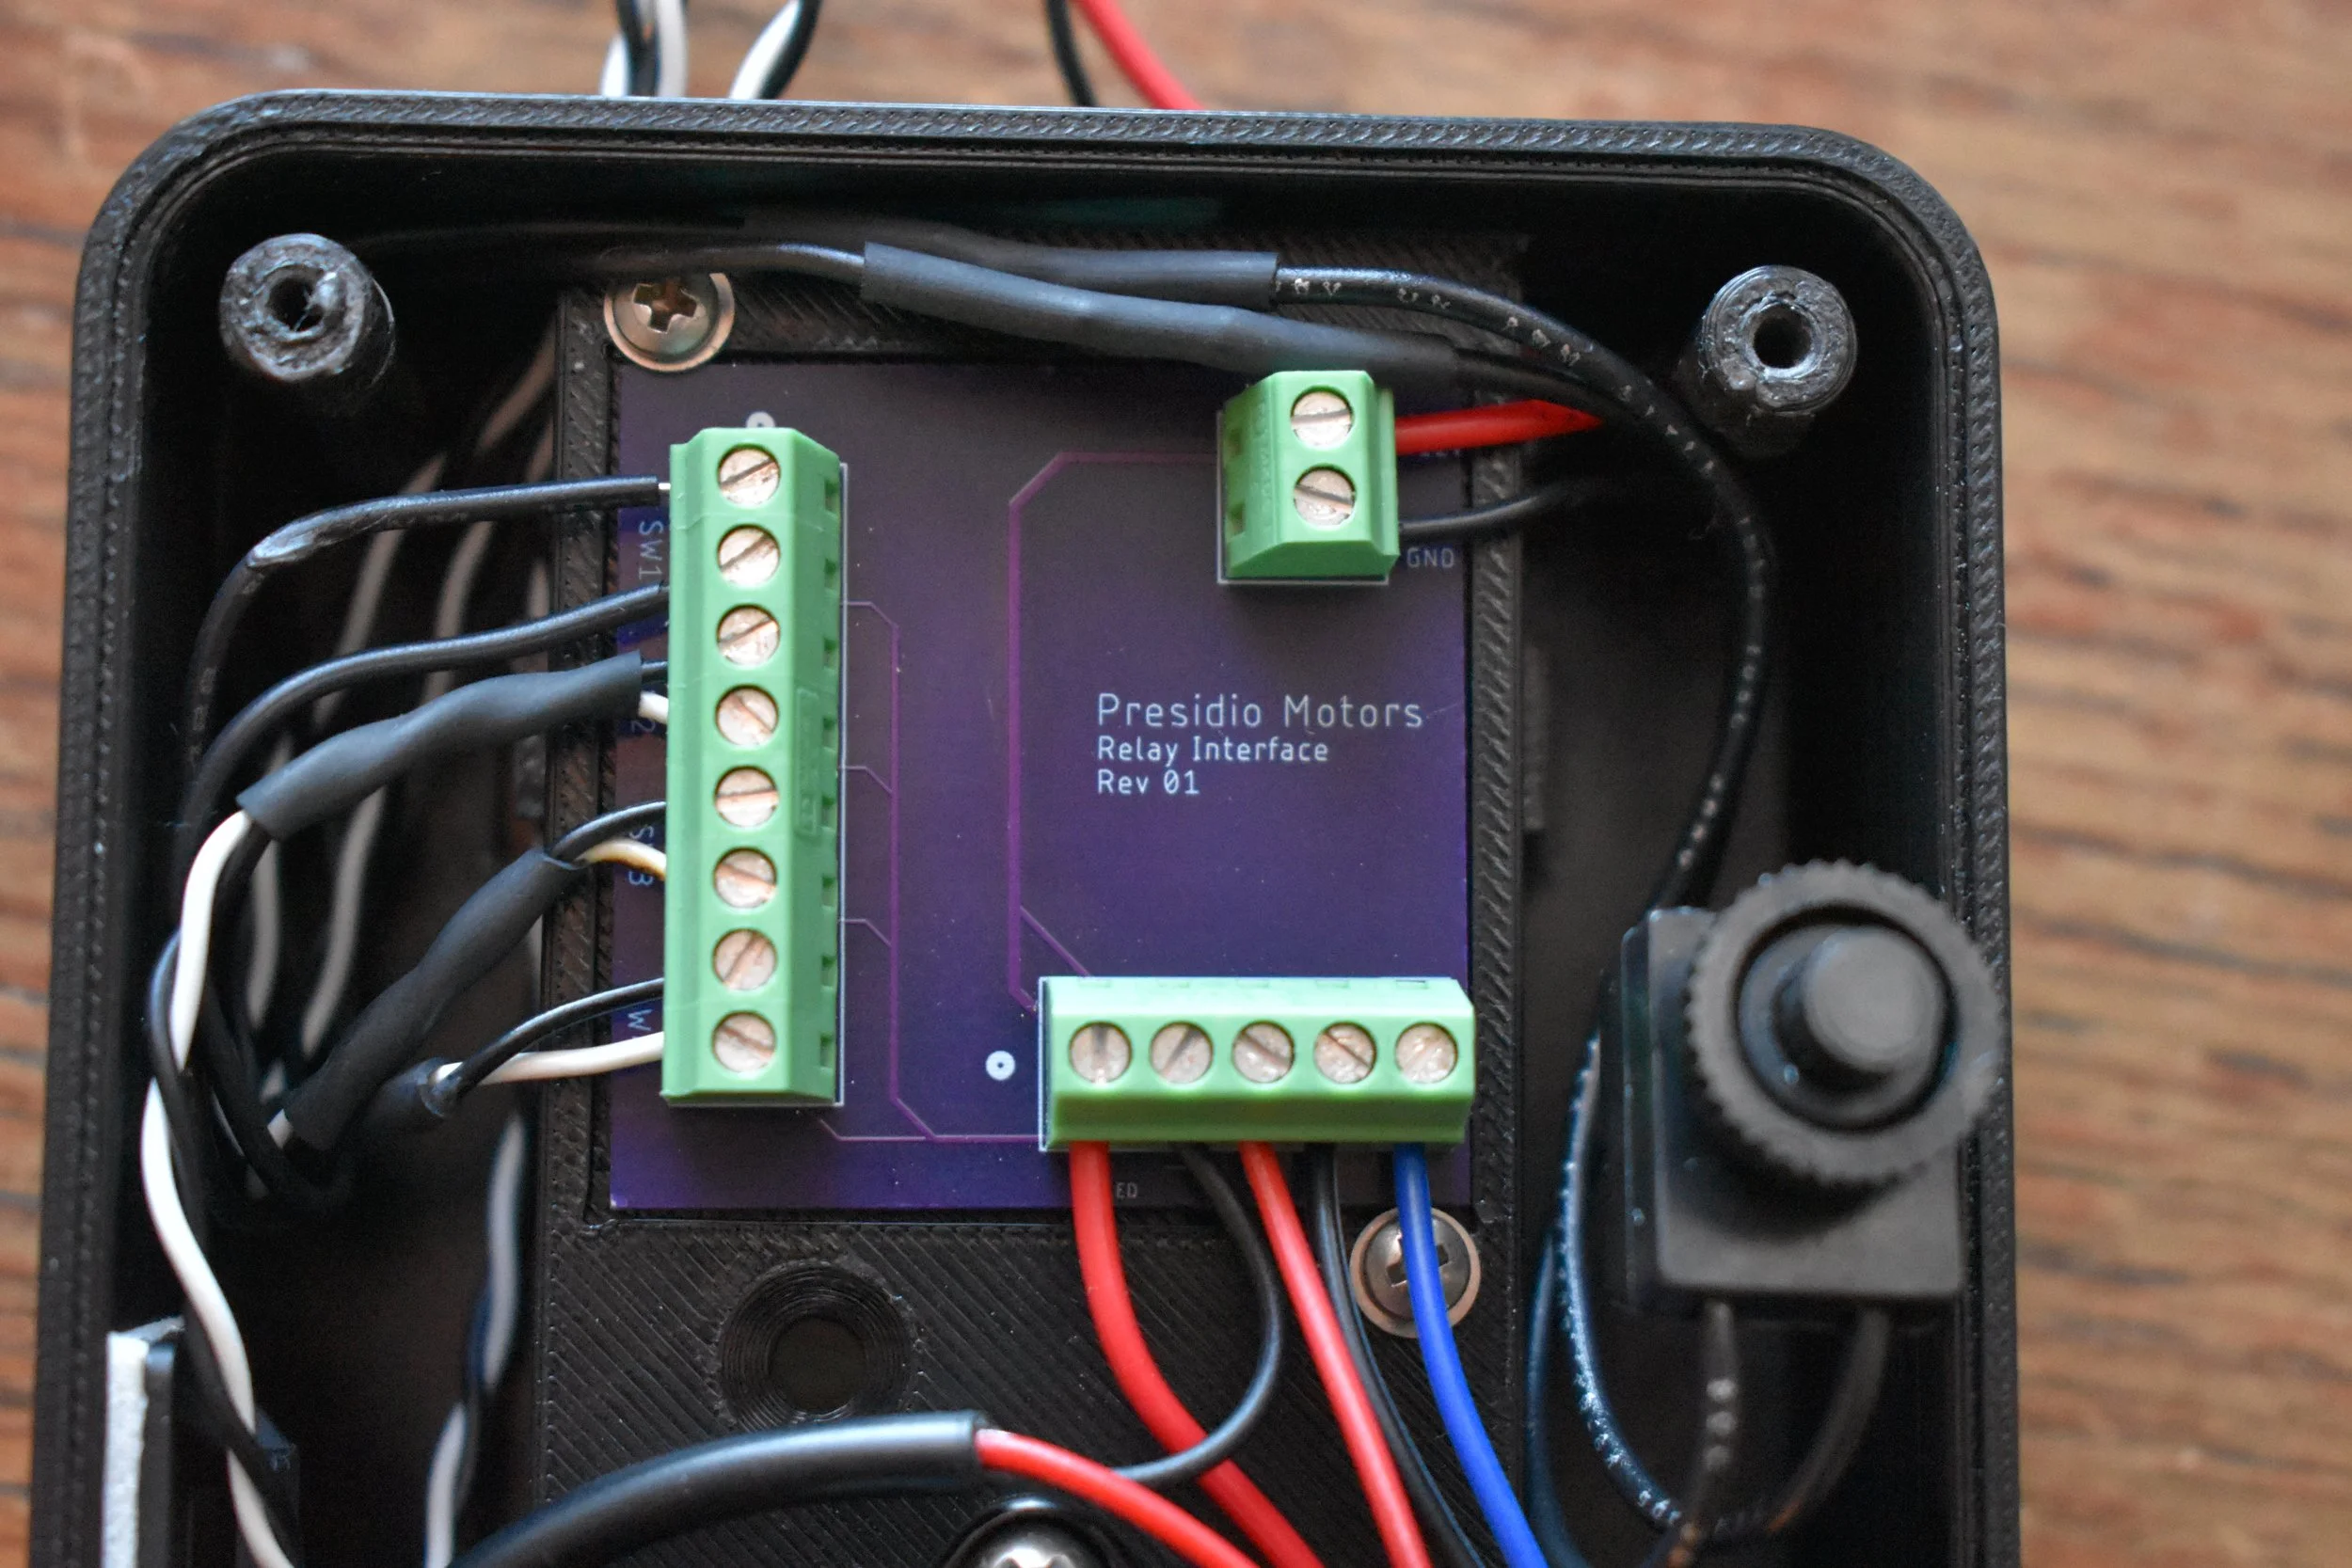
While researching components I came across some small boards that package the flip flop IC and relay in a nice compact layout. I wanted to house everything inside the dome light housing so the compact form factor was a plus. To accommodate and clean up the power and trigger wire routing inside the housing I designed a simple interface board. It routes 12V power to the relay board and LED and provides a BUS for the push button trigger wires.
I used Eagle to design the PCB and had the bare boards fabricated by OSH Park (made in USA bare PCB fabrication at a hobbyist friendly price point).

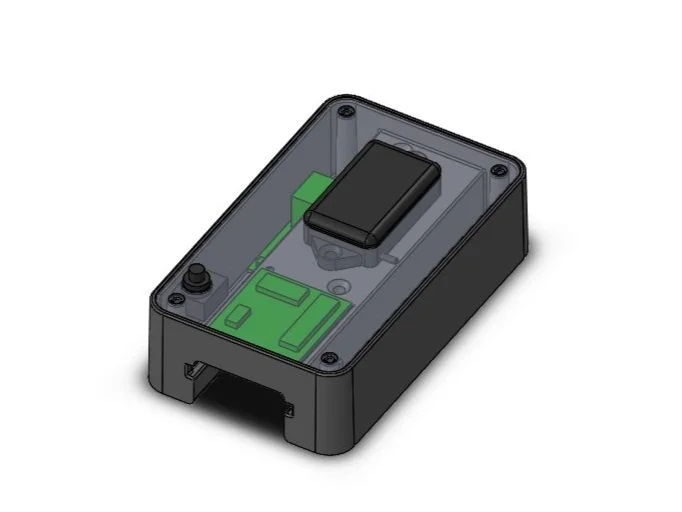
I designed the housing and housing cover using Solidworks CAD to match the footprint of an OEM dome light. I 3D printed the housing and laser cut the prototype cover from amber acrylic sheet. I had originally intended only to use the acrylic cover as a prototype, and opt for a final version in Aluminum or maybe brass but I’ve grown fond of the transparent acrylic so it’s staying for now.
I had one of these Baja Designs rock lights on hand. They have a nifty 180 degree lens, which I felt would help evenly light the cab so I chose that as the LED light source. I generally don’t love LEDs in vintage vehicles and I was concerned the light might be too harsh or white but it actually gives a pretty nice, warm light, befitting a vehicle of this era.


The cargo light can be engaged from four physical buttons: on the housing itself, from either side of the vehicle when reaching through the gullwing windows or from the back door hatch.
I’m very happy with the utility of this first version. If I ever have some extra time on my hands I may work on a second version that integrates the interface and relay PCBAs onto a single foot print which could make for a lower profile, even cleaner housing package.